It’s 7pm on a Wednesday. You’ve been up since 6am, made 47 decisions at work, and now you’re standing in front of an open fridge full of groceries you swore you’d cook. There’s chicken. There’s rice. There’s… something wilted in a bag. You close the fridge and open DoorDash.
Again.
I know this loop. I lived it. And when I finally decided to break it, I made every beginner mistake in the book.
I tried meal prepping 14 different Instagram-worthy recipes my first week. Color-coded containers. Five different sauces. A grocery bill that looked like I was catering a wedding. I lasted exactly four days before I gave up and went back to ordering $35 burritos at 8pm.
Here’s what I learned: Meal prep for beginners isn’t about perfection. It’s about breaking the 7pm decision fatigue cycle that’s bleeding your bank account dry.
Why Your Groceries Keep Rotting While Your DoorDash Bill Climbs
The average American spends $284 per month on food delivery apps. That’s $3,408 a year. Not because they love delivery, but because by the time dinner rolls around, they’re too exhausted to decide what to cook, let alone actually cook it.
This is decision fatigue at work. By 7pm, your brain has made thousands of micro-decisions. What to wear. How to respond to that email. Whether that meeting could’ve been an email. Your willpower tank is empty.
Meal prep isn’t about cooking skills or discipline. It’s about making the food decision once—on Sunday—so your Wednesday-night self has nothing to figure out.
The 4 Meal Prep Styles (Only 1 Works for Beginners)
Before you start, here’s what actually works when you’re new to this:
1. Full Meal Prep (What we’re doing) Cook complete meals, portion them out, refrigerate or freeze. Open container, microwave, eat. Best for: Beginners who need zero decisions at mealtime
2. Ingredient Prep Chop vegetables, cook proteins, prep sauces—assemble fresh daily. Best for: Experienced cooks who want variety
3. Batch Cooking Make huge batches of one thing (soups, stews, casseroles). Best for: People comfortable eating the same meal 4+ times
4. Freezer Prep Prep raw ingredients into freezer bags for future cooking. Best for: Planning 2-4 weeks ahead
For Week 1, stick with full meal prep. It requires the least daily effort and gives you immediate results.
Your Week 1 Starter Plan: 3 Meals, 2.5 Hours, $50-75
Here’s the exact plan I recommend for beginners. It’s intentionally boring because boring works.
What you’re making:
- 4 servings of chicken & rice bowls (lunches)
- 4 servings of turkey taco filling (dinners)
- 8 hard-boiled eggs (breakfasts/snacks)
Total active time: 2.5 hours on Sunday Total cost: $50-75 depending on what you already have Meals covered: 12 (plus eggs for snacks)
That works out to roughly $5-6 per meal. Compare that to $15-25 per DoorDash order.
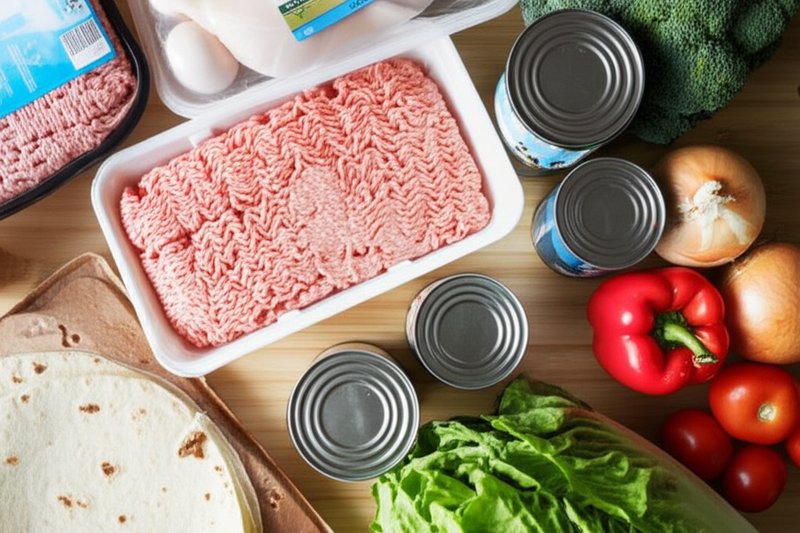
Your First Meal Prep Grocery List: $50-75, Nothing Fancy
Here’s exactly what to buy. I’m using Walmart prices as of January 2026, but adjust for your store.
Proteins (~$25)
- 2 lbs boneless skinless chicken breast: $8
- 1 lb ground turkey (93% lean): $6
- 1 dozen large eggs: $4
- 1 can black beans: $1.25
- 1 can corn: $1.25
Carbs (~$8)
- 2 lbs jasmine rice: $4
- 8 flour tortillas (or corn): $3
- 1 lb pasta (optional backup): $1
Vegetables (~$12)
- 1 bag frozen broccoli: $2.50
- 1 onion: $0.75
- 1 bell pepper: $1.50
- 1 head romaine lettuce: $2.50
- 2 tomatoes: $2
- 1 lime: $0.50
- 1 head garlic: $0.75
Pantry Staples (~$10)
- Olive oil (if you don’t have): $5
- Taco seasoning packet: $1
- Soy sauce (small bottle): $2
- Salt & pepper (if needed): $2
Optional upgrades (~$5-8)
- Shredded cheese: $3
- Salsa: $3
- Greek yogurt (for sour cream substitute): $3
Total: $50-75 (less if you have pantry staples)
Skip the $200 Gadgets: Here’s What You Really Need
You don’t need a fancy meal prep kit to start. Here’s the actual equipment:
Essential (you probably have these):
- 1 large skillet or pan
- 1 pot for rice/boiling eggs
- Cutting board
- Chef’s knife
- Measuring cups
The one purchase I’d make: Glass meal prep containers with lids (12-pack for ~$25 on Amazon). They last forever, don’t stain like plastic, and make portion control automatic.
Can’t afford containers yet? Use whatever you have—mason jars, tupperware, even cleaned takeout containers. Perfect is the enemy of done.
The 6-Step Meal Prep Process (2.5 Hours, One Sunday)
Here’s your exact game plan. I’d suggest starting at 2pm so you’re done before dinner.
Step 1: Start the Rice and Eggs (5 min active, 30 min passive)
Put 2 cups of rice in your rice cooker or pot with 4 cups water. Set it and forget it.
Fill another pot with water, add your eggs, bring to a boil. Once boiling, cover and remove from heat. Let sit 12 minutes, then ice bath.
While this cooks, move to Step 2.
Step 2: Prep Your Vegetables (15 min)
Dice the onion. Slice the bell pepper. Mince 4 cloves of garlic. Chop the broccoli if using fresh.
Keep everything in separate piles—you’ll use them at different times.
Step 3: Cook the Chicken (25 min)
Season chicken breasts with salt, pepper, and a drizzle of olive oil. Cook in a large skillet over medium-high heat, 6-8 minutes per side until internal temp hits 165°F.
Rest for 5 minutes, then slice into strips.
Pro tip: Slice chicken while it’s resting—the slices cook a bit more from residual heat and stay juicier.
Step 4: Make the Taco Meat (20 min)
In the same skillet (don’t wash it—chicken flavor adds depth), cook ground turkey over medium heat until browned.
Add half the diced onion, half the bell pepper, and the taco seasoning packet with 1/2 cup water. Simmer 10 minutes.
Add the can of black beans (drained) and can of corn (drained) in the last 2 minutes.
Step 5: Steam or Sauté the Broccoli (10 min)
If using frozen broccoli, microwave according to package directions.
If fresh, sauté in the skillet with a little olive oil, garlic, salt, and pepper for 5-7 minutes until bright green and slightly tender.
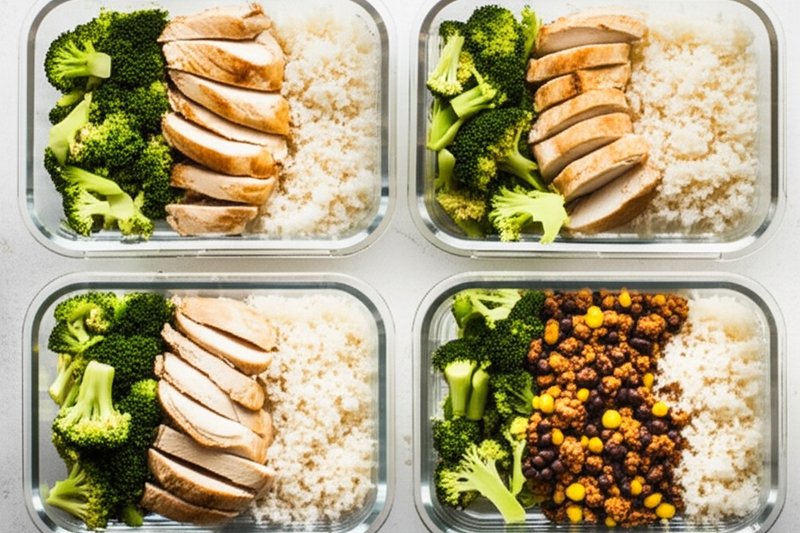
Step 6: Assemble and Store (20 min)
Chicken Rice Bowls (4 containers):
- 1 cup rice per container
- 4-5 oz sliced chicken per container
- 1/2 cup broccoli per container
- Drizzle of soy sauce
Taco Bowls (4 containers):
- 1/4 of the taco meat mixture per container
- Optional: add cheese, salsa, lime when eating
Eggs: Peel all 8 eggs. Store in a container in the fridge.
You’re done. That’s 12 meals ready for the week.
Foods That Survive in Tupperware (And Don’t Turn to Mush)
Not everything survives meal prep equally. Here’s what holds up:
Great for meal prep (3-5 days in fridge):
- Cooked chicken, turkey, beef
- Rice, quinoa, pasta
- Roasted vegetables (broccoli, bell peppers, zucchini)
- Hard-boiled eggs
- Bean-based dishes
- Soups and stews
Okay for 2-3 days:
- Salads (keep dressing separate)
- Avocado (add lime juice, store well-sealed)
- Steamed vegetables
Skip these for weekly prep:
- Anything with mayo-based dressings
- Fresh herbs (add day-of)
- Crispy items (they get soggy)
- Fish (cook within 1-2 days)
How to Reheat Meal Prep (Without Rubber Chicken)
This is where most people mess up. Cold, rubbery chicken isn’t motivation to keep meal prepping.
For rice and grain bowls:
- Add 1-2 tablespoons of water to the container
- Cover loosely (leave lid cracked or use paper towel)
- Microwave at 70% power for 2-3 minutes
- Stir halfway through
The water creates steam that rehydrates the rice and keeps chicken from drying out.
For taco meat:
- Transfer to microwave-safe dish
- Add splash of water or broth
- Cover and microwave 90 seconds
- Stir, check temp, add 30 seconds if needed
Oven method (for crispier results): Preheat to 350°F. Transfer food to oven-safe dish, cover with foil, heat 15-20 minutes.
Food Safety 101: Keep It Simple
The main rules:
- 2-hour rule: Don’t leave cooked food out more than 2 hours
- Cool before storing: Let food cool 20-30 minutes before refrigerating
- 4-day rule: Eat refrigerated meal prep within 4 days (freeze the rest)
- Reheat to 165°F: Use a meat thermometer if you’re unsure
When in doubt, freeze it. Properly stored meal prep lasts 2-3 months in the freezer.
5 Beginner Mistakes That Make You Quit by Week 2
I made all of these. Learn from my failures.
Mistake #1: Prepping too many different recipes Week 1 should be 2-3 recipes max. I tried 6 different meals my first week and burned out by Wednesday.
Mistake #2: Buying ingredients you’ve never cooked before This isn’t the time to experiment with jackfruit tacos. Stick with proteins you know how to cook.
Mistake #3: Not accounting for eating out Plan for 4-5 dinners, not 7. You’ll eat out at least once. Build that in.
Mistake #4: Forgetting about breakfast Eggs are the easiest solve. Boil a dozen on Sunday. Done.
Mistake #5: Making it Instagram-worthy Nobody cares what your containers look like. They care whether you ate the food. Function over aesthetics.
The Real Cost vs. Takeout Breakdown
Here’s what meal prep actually saves you.
Without meal prep (my old routine):
- Breakfast: Coffee shop muffin + coffee: $8
- Lunch: Chipotle or similar: $15
- Dinner: DoorDash average: $28 (meal + fees + tip)
- Daily total: $51
- Weekly total: $255 (assuming 5 weekdays)
- Monthly: $1,020+
With meal prep:
- Breakfast: 2 hard-boiled eggs: $0.75
- Lunch: Chicken rice bowl: $4.50
- Dinner: Taco bowl: $4.50
- Daily total: $9.75
- Weekly total: ~$50 (plus groceries for weekends)
- Monthly: ~$350 (including some eating out)
Monthly savings: $670+
That’s conservative. If you were ordering DoorDash for most meals like I was, you’re looking at saving $700-1,000 per month.
Want more money-saving tips delivered weekly?
Join readers getting practical strategies every Friday. No spam, unsubscribe anytime.
3 Easy Starter Recipes (Under $8 Per Serving)
Recipe 1: Simple Chicken Rice Bowls
Ingredients (4 servings):
- 1.5 lbs chicken breast
- 2 cups jasmine rice
- 1 lb broccoli
- Soy sauce, garlic, olive oil
Instructions:
- Season chicken with salt, pepper, garlic powder
- Cook in skillet 6-8 min per side
- Cook rice according to package
- Steam or sauté broccoli
- Portion: 1 cup rice, 5 oz chicken, 1/2 cup broccoli per container
Cost per serving: $4.50
Recipe 2: Turkey Taco Bowls
Ingredients (4 servings):
- 1 lb ground turkey
- 1 can black beans
- 1 can corn
- Taco seasoning
- Optional: cheese, salsa, tortillas
Instructions:
- Brown turkey in skillet
- Add taco seasoning + 1/2 cup water
- Add drained beans and corn
- Simmer 10 minutes
- Portion into containers, add toppings when eating
Cost per serving: $3.75
Recipe 3: Mediterranean Chickpea Bowls
Ingredients (4 servings):
- 2 cans chickpeas
- 1 cucumber
- 2 tomatoes
- 1/4 red onion
- Feta cheese
- Olive oil, lemon, oregano
Instructions:
- Drain and rinse chickpeas
- Dice cucumber, tomatoes, onion
- Toss with olive oil, lemon juice, oregano
- Add crumbled feta
- Stores well 4-5 days
Cost per serving: $3.25
What Success Looks Like: Week 1 Goals
Time for realistic expectations.
Success in Week 1 is NOT:
- Perfect containers
- Zero takeout
- Eating every meal you prepped
- Posting on Instagram
Success in Week 1 IS:
- Prepping on Sunday (even if just 1-2 meals)
- Eating at least 5 of your prepped meals
- Spending less than you normally would
- Not throwing away all your groceries
That’s it. If you eat 5 prepped meals and save $30 compared to your normal week, Week 1 is a win.
The Bottom Line
Meal prep isn’t about being a chef or having willpower. It’s about making one decision on Sunday so you don’t have to make 15 decisions throughout the week.
Start smaller than you think you should. Two recipes. Twelve meals. $50-75.
If you eat 8 of those 12 meals and save $100 this week, you’ve won. Do that for a month, and you’re looking at $400+ back in your pocket.
That’s money that could go toward your emergency fund, your debt payoff, or start investing with just $100.
The best time to start was last week. The second best time is this Sunday.
Your move: This Sunday at 2pm, make the chicken and taco recipes above. That’s it. Don’t overcomplicate it. See how it feels. Adjust from there.
And if you want more tips like this delivered to your inbox, join the newsletter.

Written by
Chris
Chris went from $16,000 in debt to a six-figure net worth by doing the boring stuff nobody wants to talk about. He started investing with $50 a month while still paying off credit cards. Now he writes for people who know they should be investing but haven't started yet. No finance degree, no trust fund, no complicated strategies. Just the same approach that actually worked.
More from Chris →